A Short Introduction to Photographic Lighting by Christopher John Ball

Tweet
Whether you are using flash or tungsten the basics of good photographic lighting are the same. In the world ' outside ' the studio nature has but one light source - the sun. The light from the sun is also reflected off other surfaces, i.e. the ground, buildings or diffused through clouds etc. In the studio a photographer starts from the same position, that is one light.
From this one dominant light the photographer creates the main highlights and shadows. Other lamps are then arranged to fill in any shadows that are too deep or to create secondary effects shadows. The first light will usually be nearer the subject and the most powerful. The secondary light/s tending to be on the opposite side of the subject to the dominant light.
As well as photographic lights the photographer can make use of reflectors to bounce light from other lamps back onto the subject. This in effect acts as a secondary light on a lower power setting. Indeed many superb portraits can be made with just one main light and a reflector. This reflector can be constructed from polystyrene sheeting, or wooden paneling painted white. Paper or card can also be used.
Frontal Lighting:
A light is placed in front of the subject. Here it casts no definite shadows that are visible from the position of the camera. This renders the subject in a ' flat ' or shadow-less nature.
Top Lighting:
When a light is placed directly above the subject all shadows are cast vertically downwards. This type of lighting emphasises projecting features and depressions. This is not a natural lighting method, the results look odd but can be used to creative effect.
Side Lighting:
A light placed at one side of the subject illuminates that side brightly but leaves the other side in darkness This type of lighting is accepted as natural, especially when used with a reflector or second light at half power to lighten or fill in any shadows.
Lighting from Below:
Placing a light directly below, and pointing up towards, the subject casts shadows upwards. This type of lighting doesn't occur in nature and looks artificial. It is often used for dramatic effect as images made via this form of lighting can look sinister.
Lighting from Behind:
When a photographer places a light behind the subject all shadows are cast towards the camera. If the light is placed directly behind the subject a brilliant rim of light will surround the sitter. Rim and back lighting are seen in nature, against the sun for example, so are accepted as natural. This type of lighting does leave the front of the subject in shadow, so are usually used as an effects light as part of a larger set up.
A photographer will find that there are four types of use a light can be put to. These are:
Mixed Lighting:
It is possible to mix daylight and artificial light but, if using colour and tungsten light, the temperature of the lighting has to be taken into account and any filtration applied. It is often more practical to filter the lighting to match the daylight by placing gels, in holders, in front of the light. Flash doesn't need to be matched when used with daylight.
Below are a few basic lighting techniques for you to try out.
Basic Photographic Studio Lighting Techniques:
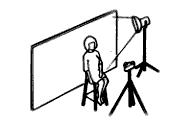
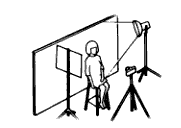
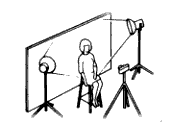
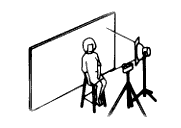
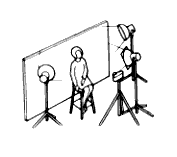
One light placed to the right of the subject at 45 degrees and pointing down by 45 degrees. One light placed to the right of the subject at 45 degrees and pointing down by 45 degrees and a reflector placed to the left of the subject so as to bounce light back onto the subject. As above but replacing the reflector with a second light. This is set to half power. Here a single photo light is placed near the camera. The light is diffused by either a gauze or other diffusing material or attachment. Here two lamps are added to the previous lighting set-up so as to light the background.
Photographic Lighting Equipment:
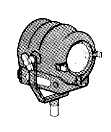
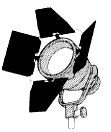
Tungsten Photoflood ( 3200K ) Tungsten Spotlight ( 3400 K ) Quartz Tungsten Light with Barn doors fitted.
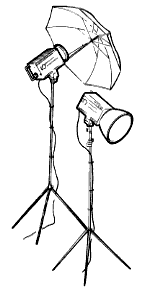
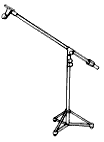
Lighting stands with Flash heads fitted. Also an umbrella reflector/diffuser. ( 5500 K ) Lighting Boom Arm. This is counter balanced and is used for placing a light directly over the subject. July 2024 Several books, featuring Christopher John Ball's photographs, are now available through Amazon or click on an image below to purchase via secure payments on lulu.com

Tweet


