|

A
Short Introduction to the Gum Bichromate Process by Christopher John
Ball
|
|  |
The
gum bichromate process draws on techniques first developed by
Alphonse Louis Poitevin in 1855. It was in this year that he
patented a process he called 'helio-plastic'. He had found that
when bichromated gelatine was exposed to a light, strong in
UV, under a negative and then soaked in water; parts of the
gelatine stood out in relief to form an image. This was because
the bichromated colloid had undergone a hardening process, making
it more or less insoluble, in proportion to the action of light.
In the same year he discovered that the bichromated gelatine
which had been exposed to light would allow greasy ink to adhere
to it, although it repelled water. He used these properties
as the basis for a photo-lithographical process. Poitevin is
looked upon as the founder of photo-lithography, the carbon
process and collotype printing. In 1867 he was awarded the greater
part of a prize of 10,000 Francs for the discovery of a permanent
photographic printing process.
The gum-bichromate process takes these techniques and adds the
ability of the bichromated gelatine to trap a pigment. When
exposed to light, in contact with a negative, and ' developed
' in water the resulting raised image was rendered visible because
of the trapped pigment. The gum bichromate process creates is
a perfect 'alternative' photographic technique for the creation
of erotic imagery.
The materials required to make a gum-bichromate print are as
follows:
-
-
-
-
Formaldehyde
( 37% solution )
-
Pure
Gum Arabic ( 12 to 14 degrees baume gum )
-
-
-
-
-
-
Ultra
Violet light source
-
Tube
water colour pigments. N.B. Get the best available and not
student grades.
-
-
-
-
-
-
Soft
brushes containing no metals. Japanese/Chinese style calligraphy
brushes, that have been stitched, are best.
-
-
-
*
Vegetarian's may want to try alternative vegetable gelatin
substitutes.
As stated use a pure liquid gum arabic and the highest
quality water colour. You will find that some pigments have
greater staining strengths than others, so you will need to
experiment between manufacturers. It has been my experience
that certain colours may react with the dichromate, in particular
chrome colours, cobalt, zinc and viridian.
The pigment and gum are mixed according to the desired intensity
of colour.
The following mixtures may be used as a starting point:
| Alizarin
Crimson = 1 gram of pigment + 18ml of gum arabic |
| Windsor
Blue = 1 gram + 20ml |
| Cadmium
Yellow Pale = 1 gram + 26 ml |
| Lamp
Black = 1 gram + 40 ml |
| Windsor
Green = 1 gram + 20 ml |
| Payne's
Grey = 1 gram + 20 ml |
| Neutral
Tint = 1 gram + 36 ml |
| Cerulean
Blue = 1 gram + 20 ml |
| Indian
Red = 1 gram + 20 ml |
| Burnt
Umber = 1 gram + 20 ml |
| Cadmium
Red = 1 gram + 20 ml |
| Charcoal
Grey = 1 gram + 20 ml |
To
make the Sensitiser you need:
| Ammonium
Dichromate: 30 gramme's |
| Distilled
Hot Water: 75mls |
| Distilled
Cold Water: 100mls. |
Mix equal parts of the gum pigment mixture and
the dichromate solution, remember to stir well.
Preparation of the paper support :
To allow for proper registration the paper
needs to be pre-shrunk. Indicate the back, and top, of the paper
with a pencil. Then place the paper to soak in tray of extremely
hot water for between 30 and 45 minutes. Hang the paper to dry.
Sizing:
Place 30 grams of gelatin, or vegetable variant, in 1 litre
of water. Let the gelatin soak for about a half hour and then
gently heat the container until the gelatin has dissolved.
Once dissolved place the solution in a tray. Next place a sheet
of pre-shrunk paper into the tray and gently rock it. Allow
the paper to soak for about 20 minutes.
Hang the paper to dry.
N.B.: If you are going to apply a number of
coats of emulsion it is advisable to size the paper twice.
Hardening:
Take
the 37% formaldehyde solution and dilute 25ml with 1 litre
water.
N.B: DO THIS IN A WELL VENTILATED
AREA AS THE FUMES ARE TOXIC.
Soak the paper in a tray of this solution for 15 minutes,
then hang to dry.
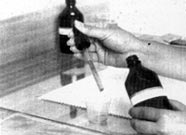
How
to apply:
The gum bichromate solution must be applied
with a soft brush that contains no metal.
Using the mapping pins, fix the paper to a drawing board.
Apply the mixture keeping the brush strokes long and moving
left and then right to avoid streaking. It is best to apply
the solution with one brush then blend it with a dry brush.
The emulsion is not sensitive until almost dry
Dry the paper in the dark but do not be tempted to use heat
as this will cause the gum to harden.
Exposure:
You should expose the materials as soon as ready and develop
as soon as exposed.
The negative that will be found to print best is one that is
thinner than that usually used for printing via an enlarger,
i.e. without strong contrasts.
The negatives are printed in contact using a printing frame
and registration pin. Remember to punch holes in the paper.
You can expose the negatives in sunlight but an artificial light
source allows for greater control and repeatability.
Unlike the cyanotype process, there is only a slight visible
image formed during the exposure stage.
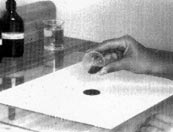
Development
of the exposed image:
To develop the image gently place the paper, emulsion side down,
into a tray of cold water. This will allow the soluble gum and
pigment, i.e. those parts of the image that have been proportionally
less affected by the action of light, to dissolve out of the
paper in their own time. This may take between 20 minutes and
as long as 6 hours, depending upon the image depth.
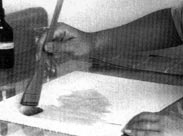
Another method is to use a spray gun, such as that used to spray
house plant leaves, to gently wash away the soluble parts of
the emulsion.
This method works best if you first place the paper, face down,
in a tray of water for about 20 minutes.
This method allows for creative development of the image. The
highlight tones can be controlled by varying the force of the
spray. Apply a stronger spray to remove more of the image.
When you have an image that is as you require, hang the paper
to dry. Please take great care as, when wet, the image surface
is very delicate. Do not allow other prints to touch each other
whilst drying.
Double
Coating
The contrasts, and image depth, of the print
can be controlled by double coating. After the print has been
made and finished, the surface is given another coating and
exposed etc again.
For this to work you must use some method of registration
This can be repeated until a satisfactory image has been obtained.
July 2024 Several books, featuring Christopher John Ball's photographs, are now available through Amazon or click on an image below to purchase via secure payments on lulu.com
Return
to Articles Contents
|